Build a Business Blog – How To Create a Menu
Every blog needs to be easy to navigate – and WordPress now lets you create custom menus which can often be placed in different locations on your blog to improve the user experience. See below for a step by step on how to create a place your custom navigation menu.

This post may contain affiliate links which means we receive a small commission at no cost to you when you make a purchase. As an Amazon Associate, I earn from qualifying purchases.
Custom Menus for Navigation
WordPress allows for you to create custom menus for your blog that can be used for main navigation, or even in widgets to direct readers to different locations on your blog.
If you look at the PartyPlanDivas site for instance – the different lists that you see in the sidebars are actually custom menus that I have created, and then placed into widgets.
The top navigation bar along the header of PartyPlanDivas is also a menu.
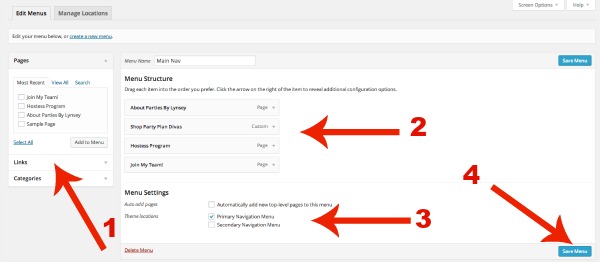
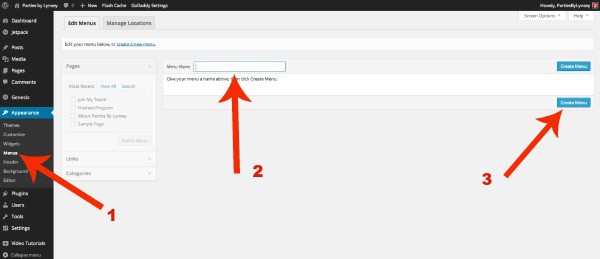
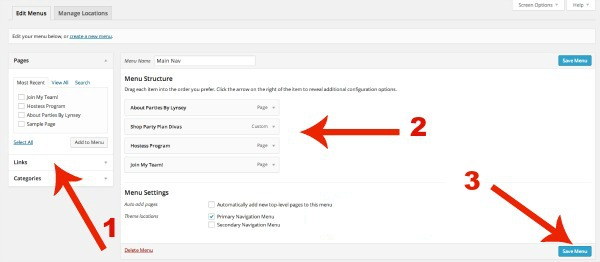
To create a new menu for your top navigation, go to Appearance -> Menus (1) then create your menu name (2) –Main Nav, Sub Nav, whatever – doesn’t matter -and then click Create Menu (3).

From there you can create your menu by adding posts, pages, external links (like a link to your replicating website) and even full categories (1).
Simply click the boxes next to what you want to add, and click “Add To Menu.” You can then drag and drop the items in the order that you want them (2).
Below that you can set the location of where you want the Navigation Menu (3) and then click Save (4).
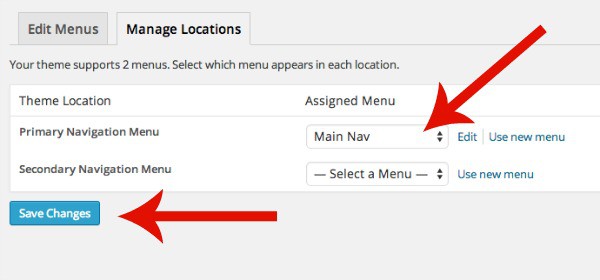
You can also Manage the Location of your navigation menus by clicking on Manage Locations at the top of the screen, and using the drop down menus to place your custom menu in the appropriate spot.
The Primary Navigation and Secondary Navigation are secured locations built into your particular theme and may vary from theme to theme.
To add an additional menu outside of your set navigation area, you will need to use a widget as explained below.
Custom Menus in Widgets
To create a custom menu for your sidebars or other widgetized areas, you will create a menu the same way you did above – leaving out the location.
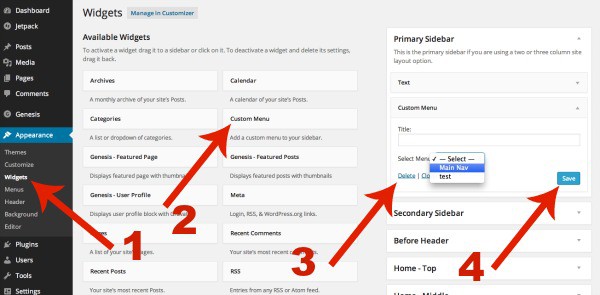
Once the menu is completed, go into Appearance -> Widgets (1). Drag and drop the Custom Menu Widget where you want the menu to appear (2-3) Title your menu and choose which custom menu that you want to use (3) and hit Save (4)
Be sure to then check your blog to make sure it is in the correct place and see if anything needs to be edited such as shorter titles.
Voila! You can use as many custom menus as you would like in your theme! Link to favorite websites, link to favorite posts within your blog, and more!
HOMEWORK
Create your Menus for your blog and add in the necessary links! Make sure to test each one for accuracy!