Build a Business Blog – Hosting
Once you have your domain purchased, the next thing you want to do is purchase hosting. Remember – your domain is your address, your hosting is your plot of land, and WordPress is your house.
All three is what is needed to live. Self Hosting your blog ensures ownership as well as full functionality with your blog, plugins, content and more.
This post may contain affiliate links which means we receive a small commission at no cost to you when you make a purchase. As an Amazon Associate, I earn from qualifying purchases.
You can buy hosting from a myriad of places like buying a domain, but since we bought the domain from TheOneStopBlogShop, I am going to use them for this training as well.
After you have purchased your domain, you will go back to TheOneStopBlogShop.com and click on “Hosting” in the top navigation bar. The navigation will drop down and you will see a link for “Purchase Hosting”

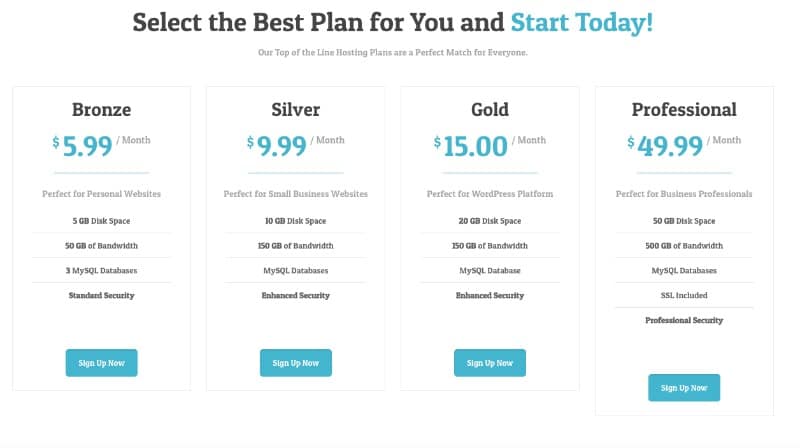
This will open up your Hosting Options for a WordPress Blog. For one blog you only need the starter package – but keep in mind as your blog grows, your hosting plan may need to as well. Choose your plan and continue.
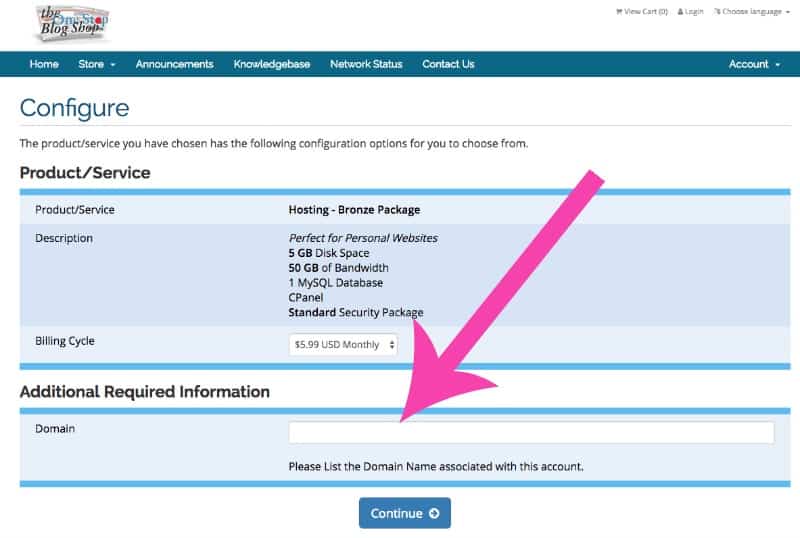
Make your selection and click “Sign Up Now” – that page will take you to the Configure Page where you will put your new domain name to connect the hosting. Make sure it is spelled correctly and hit Continue.
Proceed to checkout and place your order.
Congrats! You have just purchased your little “plot of land” on the Internet! You will receive an email once your hosting account has populated.
Installing WordPress
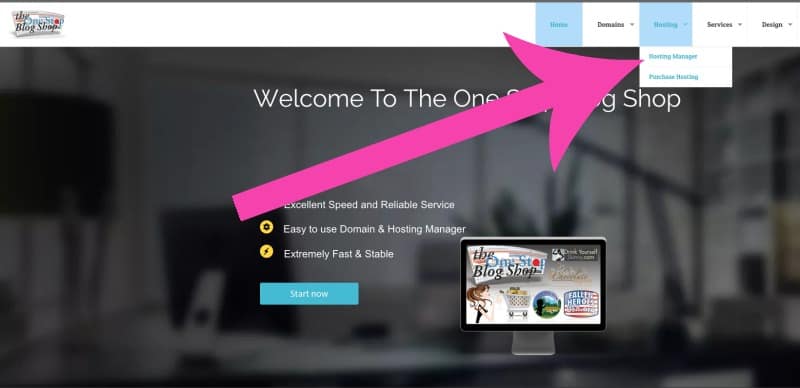
Now it is time to install your WordPress Software. This part is a bit techy – but it is necessary for the complete control and ownership of your site and all of its content. Go to TheOneStopBlogShop and go to “Hosting -> Hosting Manager”
This will open a new window that will prompt you to set up your new site. This is your cpanel and the login information will be in the email you receive when your hosting account is set up.

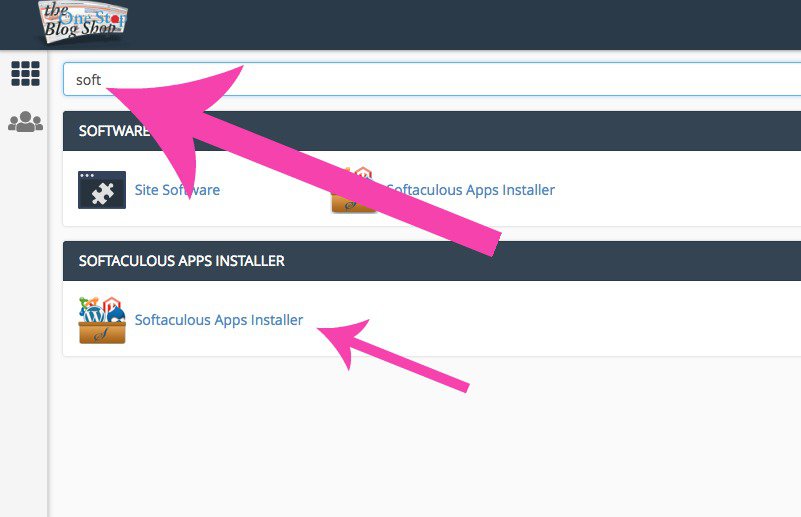
This will open a screen with a grid of different folders. You are looking for the Softalicious App Installer. You can also type in “soft” in the search bar up top until it shows up.
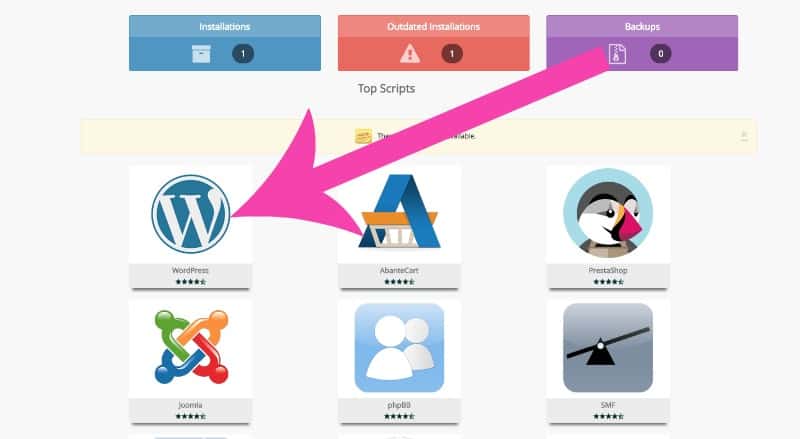
That will open a screen of applications available for installation. Find WordPress and hover over to click Install.
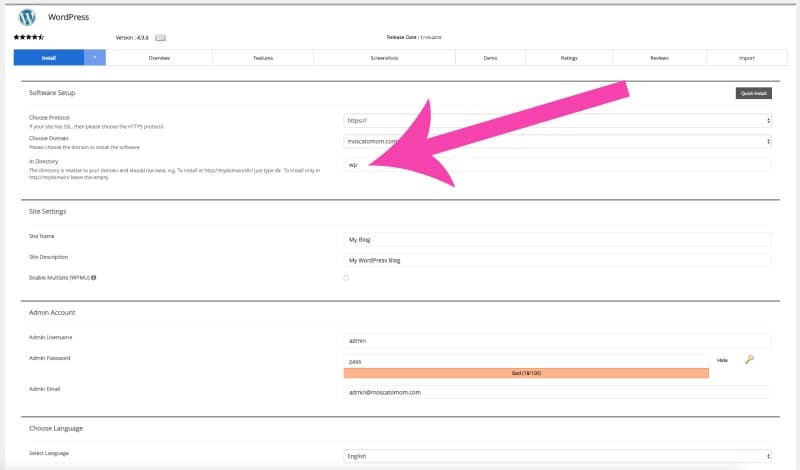
This last screen is where you will configure your WordPress Dashboard setup. The most important thing on this screen is to REMOVE THE DIRECTORY EXTENSION. You want your blog installed directly on your .com – not on .com/wp
You can then put the title of your blog and set up your username and password to log in to your WordPress dashboard. When everything is filled out, scroll to the bottom and click “Install.”
CONGRATS! Your hosting is in the works getting all set up! You will receive an email once everything is properly connected and you will then be able to login to your NEW WordPress Dashboard which will be located at YourDomain.com/wp-admin